How to solve common issues with Rock Band 3 customs.

Customs not working online / Scores not saving

The PS3 version of Rock Band 3 can only remember scores for numeric song IDs. If a converted song has letters in the song ID, it will create a new one every time the game starts. This means your score is wiped every time.

Online will also have problems, with songs appearing grey even if you and other players have the same song installed. To avoid this, the CON file needs a numeric ID.
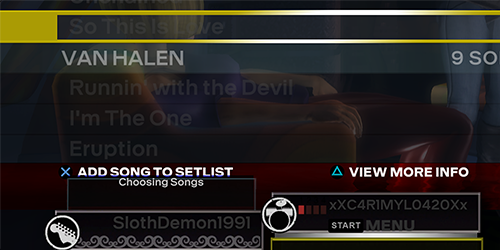
A screenshot of Rock Band 3, showing songs with a darker color as they are disabled.

You can solve this issue by correcting the IDs with Nautilus.

Fixing IDs Before Installing

1. Open Nautilus and select Batch DTA Processor.
A screenshot of Nautilus. A cursor hovers over "Batch Processor."

2. Drag and drop any CON in your folder of customs you want to install then click Begin to start processing the entire folder.
Make sure that Automatically change alphanumeric songs IDs to unique numeric IDs is enabled!
A GIF of Nautilus' Batch DTA Processor. Songs are being dragged then dropped into it then, after "Begin" is click, it starts processing.

3. After it’s done, you can close out Batch DTA Processor and go back to step 4 of [the main tutorial].

Fixing IDs of Installed Songs

1. Open Nautilus and select PS3 Converter.
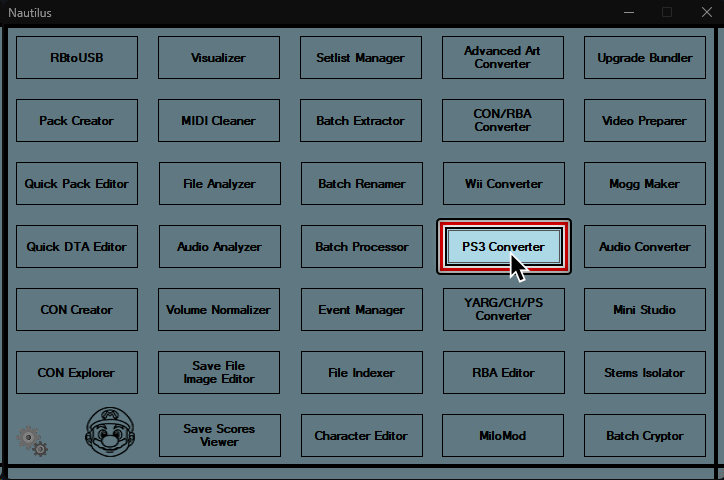
A screenshot of Nautilus. A cursor hovers over "PS3 Converter."

2. At the top of the PS3 Converter window, go to:
Numeric ID Options > Batch replace song IDs
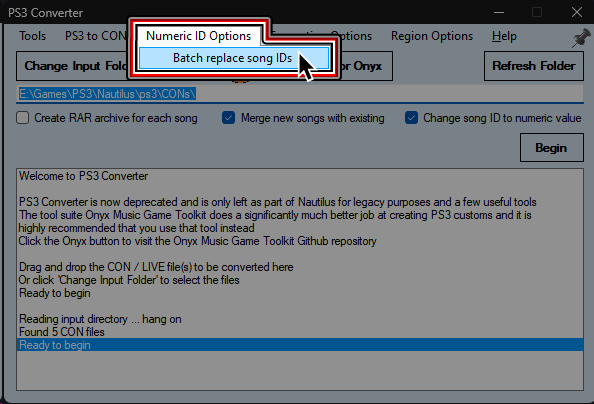
A screenshot of Nautilus's PS3 Converter. A cursor hovers over "Batch replace song IDs" under the "Numeric ID Options" menu.

3. On either PS3 or RPCS3, navigate to song/pack containing the song with the bad ID (normally within dev_hdd0\game\BLUS30463\USRDIR\[SONGNAME]\songs).
After finding it, select the songs.dta file within the folder. A screenshot of a file browser window. "dev_hdd0" is selected and the cursor is over "Open".
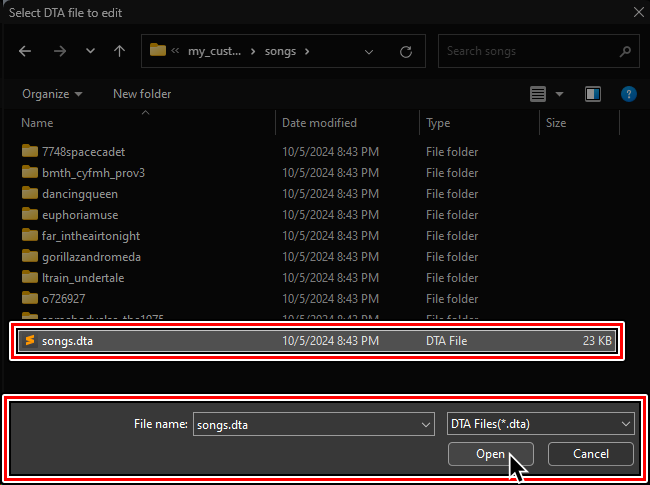
4. Wait for it to finish correcting every song within that pack. When it finishes, you can share the fixed songs.dta file with your friends to play the previously unavailable songs together.
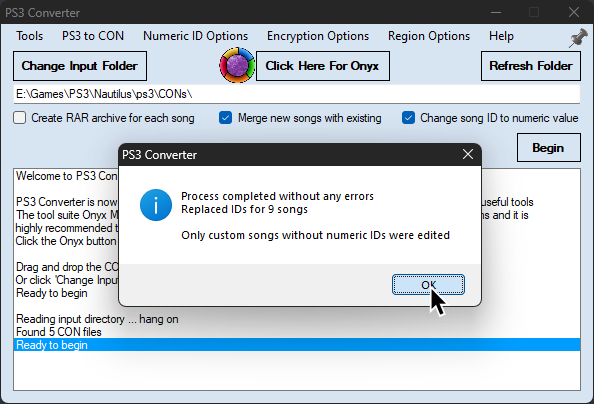
A screenshot of Nautilus's PS3 Converter. It has just finished replacing custom songs without numeric IDs.

Songs Stuck Looping at the End

Occasionally certain songs may freeze toward the end of the chart, constantly looping the last bits of the audio endlessly.

  • You will need need the original CON file to fix this issue!
  • Do not run every song through this if it does not need fixing, the audio will be re-encoded and will have a slight decrease in audio quality

1. Open Nautilus and select PS3 Converter.
A screenshot of Nautilus. A cursor hovers over "PS3 Converter."

2. At the top of the PS3 Converter window, go to:
Tools > Batch fix looping songs
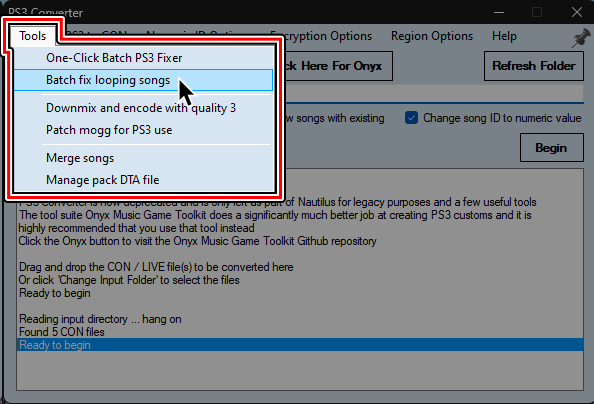
A screenshot of Nautilus's PS3 Converter. A cursor hovers over "Batch fix looping songs" under the "Tools" menu.

3. Go to the folder where the problematic CON is at and select the folder.
Wait for it to finish.
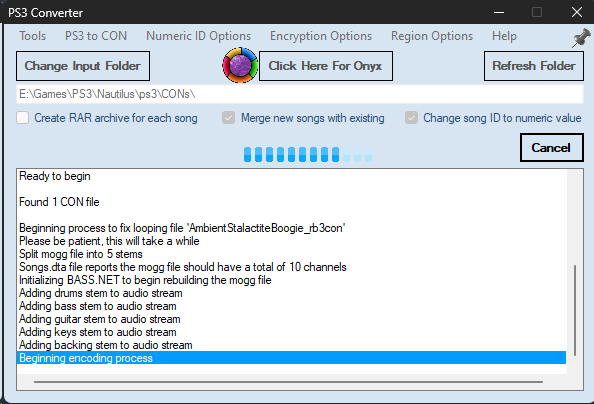
A screenshot of Nautilus's PS3 Converter. It is in the process of fixing a looping file.

4. After it’s done, you can go back to step 4 of [the main tutorial].

Delete individual songs in a pack

Rock Band 3 can delete a song in-game. However, if a song is part of a pack, it’ll delete that entire pack as well.
A screenshot from Rock Band 3, warning the user that they're about to delete many songs from the library.

The best way to remove a song from a pack is through Nautilus’ “Quick Pack Editor.”

1. Open Nautilus and select Quick Pack Editor.
A screenshot of Nautilus. A cursor hovers over "Quick Pack Editor."

2. Open a file browser window and navigate to the pack folder that contains the song you want to remove and look for the songs.dta file.
It will usually be in dev_hdd0\game\BLUS30463\USRDIR\[PACKNAME]\songs). A screenshot of a file browser window. "songs.dta" is selected.

3. Drag the songs.dta file into the Quick Pack Editor.
Select the songs you want to remove then click Remove selected.
When you’re done, click Save to lock your changes in.
A GIF of a "songs.dta" file being dragged and dropped into Nautilus' Quick Pack Editor.

4.. Even though the song is deleted from the songs.dta file, they will still take up space.
You have to delete the song’s corresponding folder as well.
A screenshot of a file browser window. Multiple songs are selected and the cursor hovers over a popup menu option that says "Delete."

PS3: Greyed out customs

By default, the PlayStation 3’s Parental Controls are set to level 9.
This doesn’t allow customs that are classified as “Unrated”, causing them to appear grey. A screenshot of Rock Band 3's song library. It shows as greyed out song.
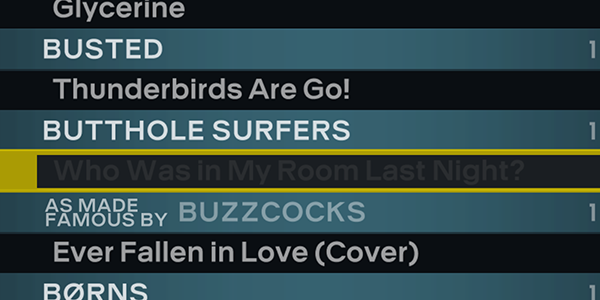
Selecting these songs will cause a crash. To fix this, set the Parental Control to Off in:
XMB: [ Settings ] -> [ Security Settings ] -> [ Parental Control ] -> [ Off ]
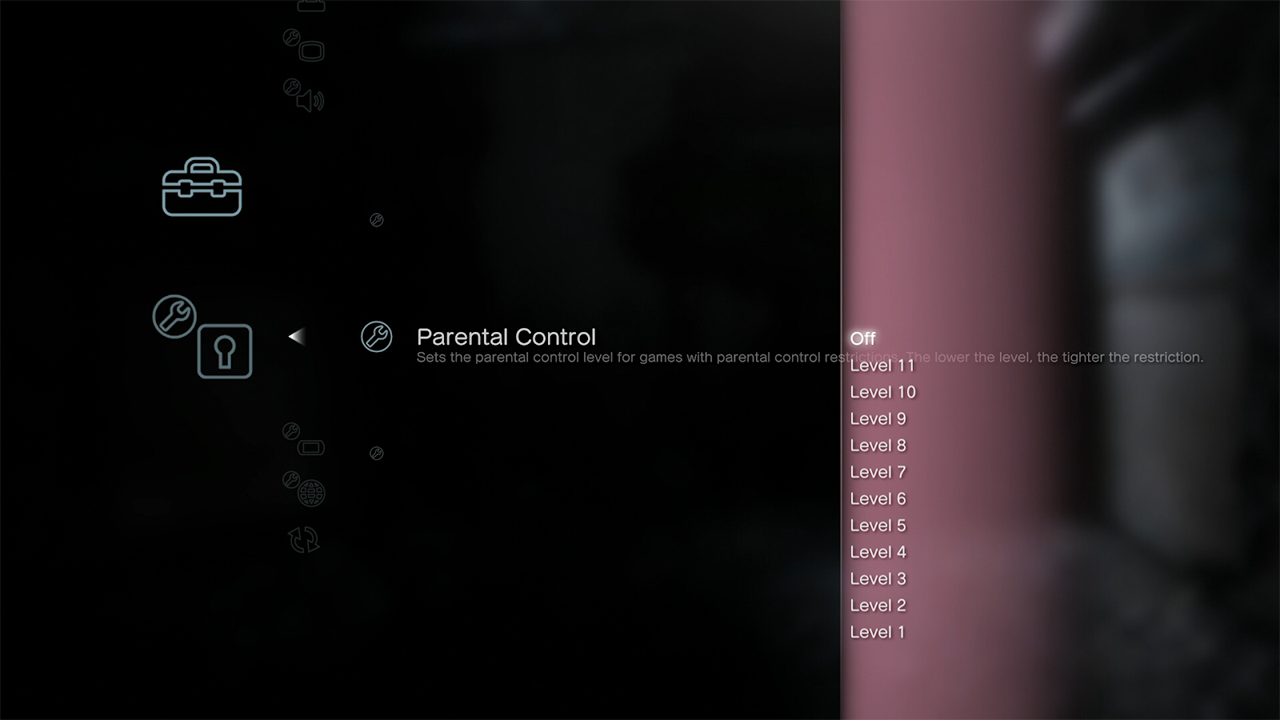
A screenshot of the parental control menu in PlayStation 3's XMB home menu. The level is set to "Off".

Songs still infinite loading

In very rare cases, songs might still have infinite loading, even after the using PS3 fixer.

You can fix this with Nautilus’ Batch Cryptor.
Do note that you’ll need to have “Rock Band 3 Deluxe 1.1 Beta 4” or newer if you’re on PS3.

1. Open Nautilus and select Batch Cryptor.
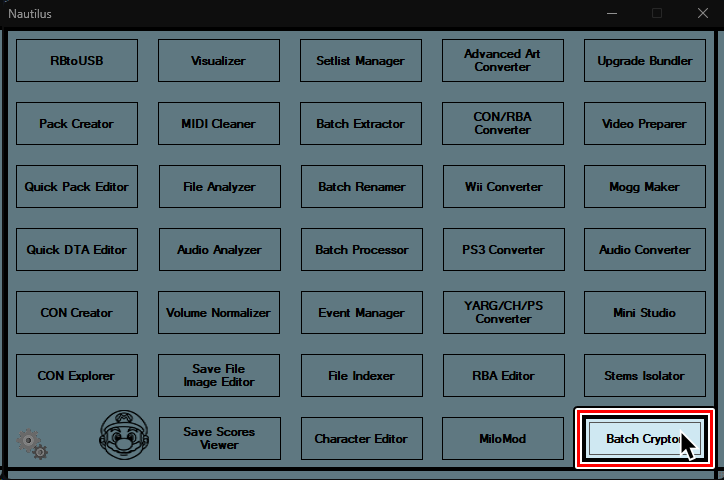
A screenshot of Nautilus. A cursor hovers over "Batch Cryptor."

2. Swap to Decrypt at the bottom of the screen.
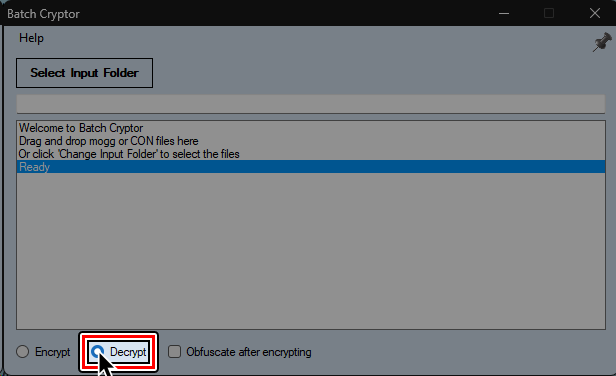
A screenshot of Batch Cryptor. The mode has been switched to "Decrypt."

3. For both PS3 and RPCS3 users, navigate to the folder containing the song you wish to fix.
It will usually be in dev_hdd0\game\BLUS30463\USRDIR\[PACKNAME]\songs\[PROBLEMATICSONG]).
There will be a .mogg file in the song’s folder.
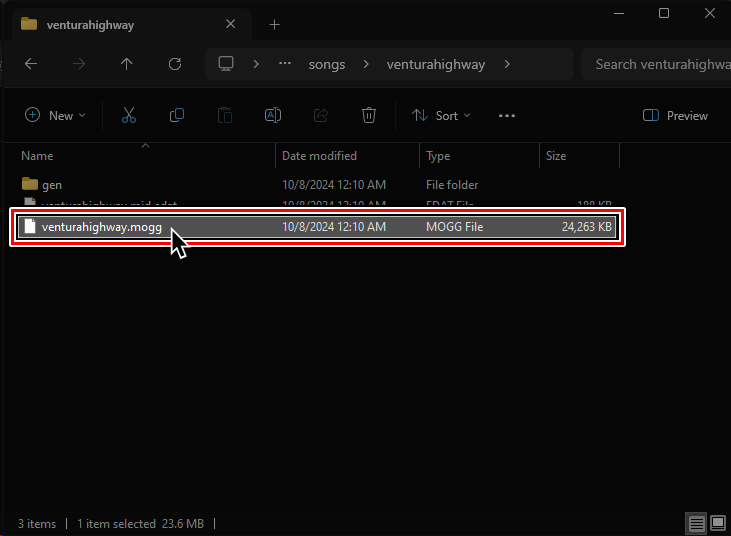
A screenshot of a file browser window. A mogg file is selected.

4. Drag and drop the song’s .mogg file onto Batch Cryptor and click Begin.
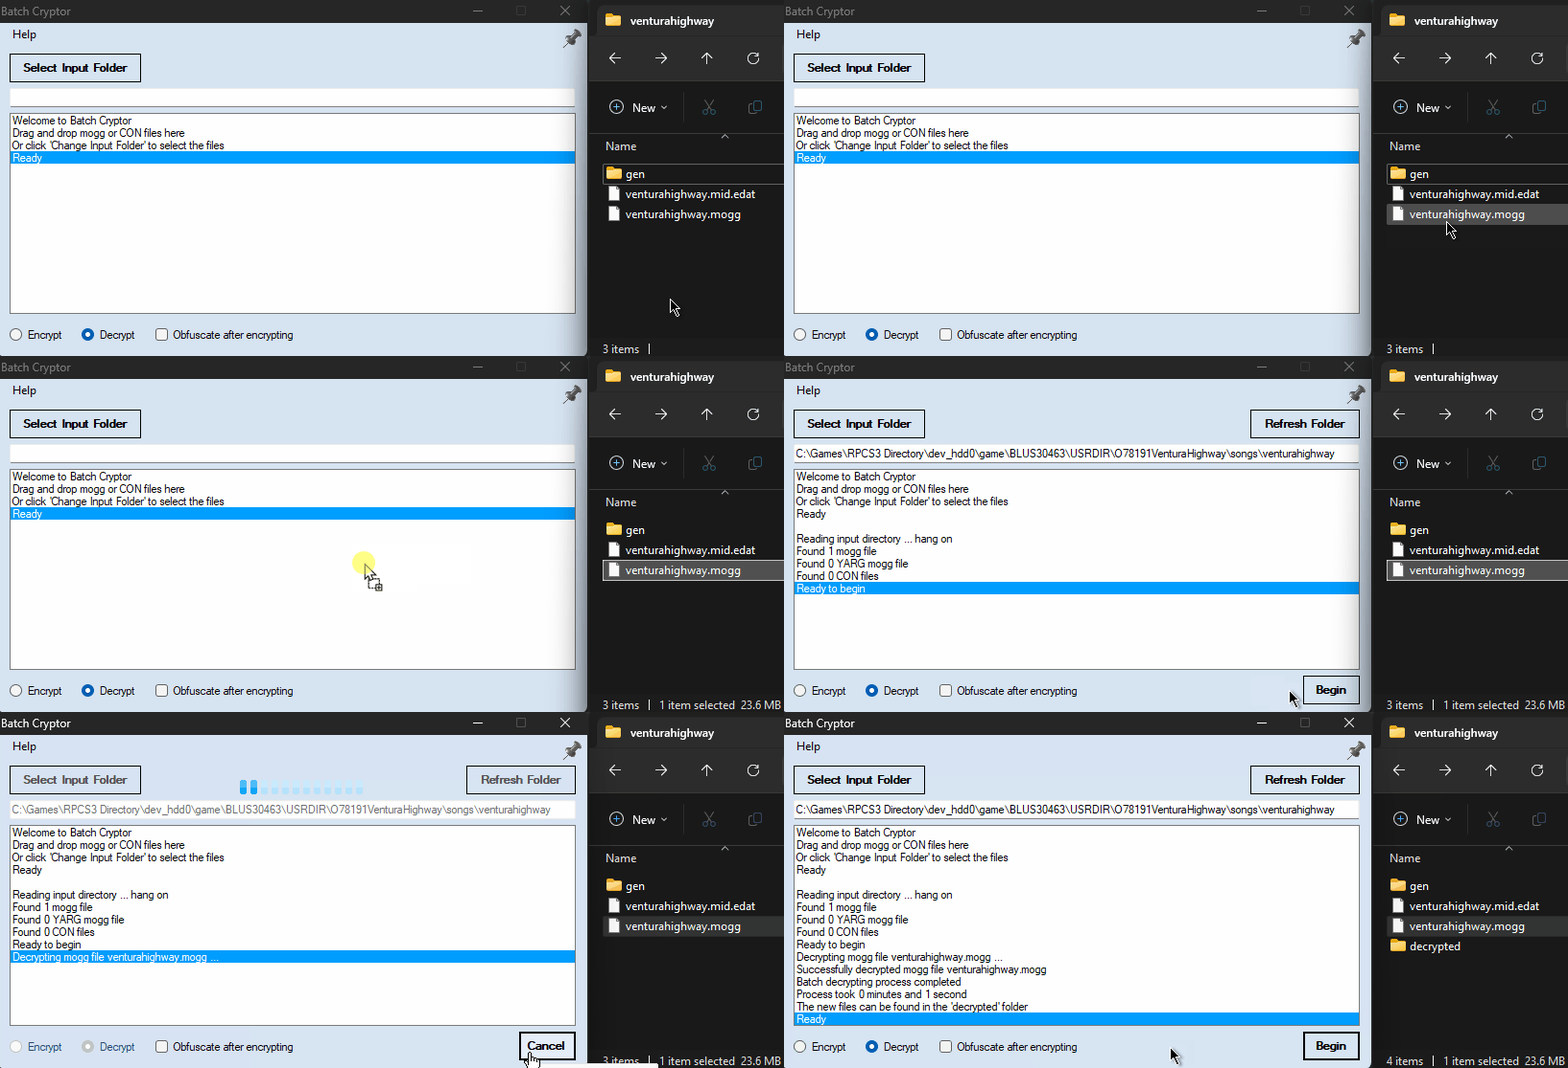
A GIF of a .mogg file being dropped into "Batch Cryptor" the being decrypted.

5. A new folder called decrypted will appear when it finishes.
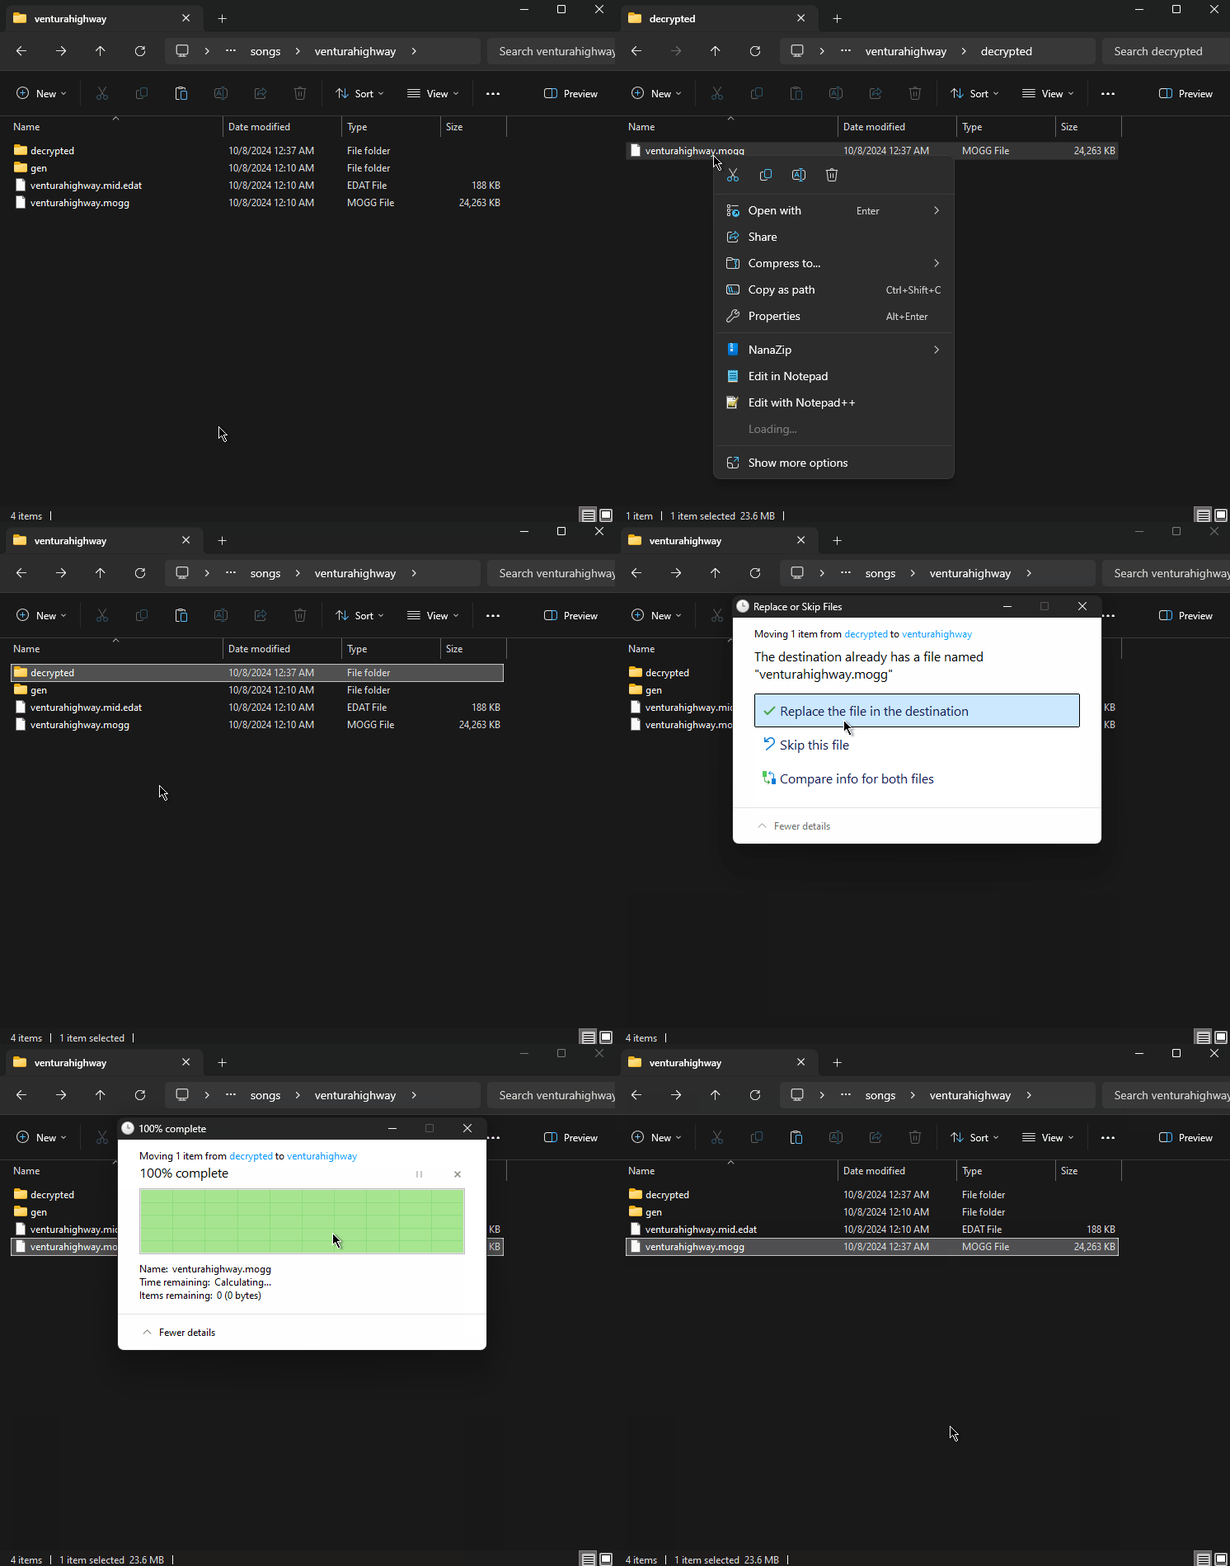
Go into the new decrypted folder and cut the .mogg file inside of it.
Go back to the song’s main folder and replace the old .mogg file. A GIF of a .mogg file within the "decrypted" folder being cut then pasted in the folder before it. It replaces the old .mogg file.